Authelia is an open-source authentication and authorization server and portal. It is designed to provide identity and access management (IAM) solutions, such as multi-factor authentication (MFA) and single sign-on (SSO) for web applications through a web portal. Authelia acts as a companion for common reverse proxies, assisting them in the process of determining whether to allow, deny, or redirect requests based on authentication and authorization policies.
It primarily facilitates two types of authentication: first-factor authentication (1FA), which is typically done through a username and password, and second-factor authentication (2FA), which involves additional methods such as one-time passwords, authentication keys, and more. Authelia also enables the application of granular authorization policies to restrict access to specific resources or domains based on the user's identity and the configured criteria.
Authelia + Reverse Proxy: Enhanced Security
When Authelia is used in conjunction with a reverse proxy, it can intercept requests to various services and enforce authentication and authorization as defined by the configured policies. This way, even services without native login capabilities can be protected by Authelia's login page.
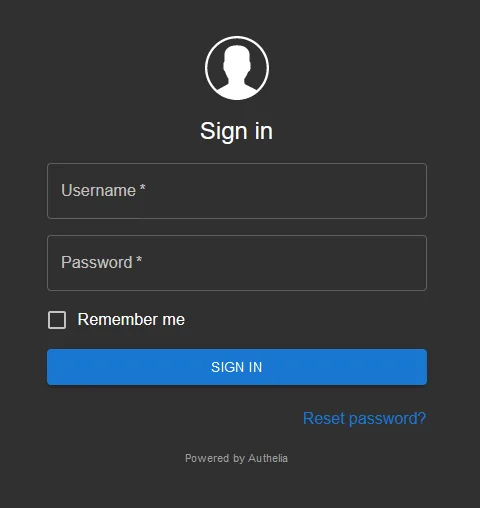
Authelia Login Page
This guide assumes you are familiar with Docker and Nginx Proxy Manager is already set up and configured.
Configure Authelia
Setting up Docker Compose File
- Use the following Docker Compose file and deploy the stack:
cd ~
mkdir authelia
cd authelia
nano compose.yml
version: '3.3'

services:
  authelia:
    image: authelia/authelia:latest
    container_name: authelia
    restart: always
    volumes:
      - /home/Auth:/config
    ports:
      - 9091:9091
    environment:
      - TZ=Europe/London #Change it to your timezone
docker-compose up -d
Editing Configuration Files
- The deployment will generate a placeholder config file under the specified volume. This has to be configured manually, within the Docker host:
cd /home/Auth
cp configuration.yml configuration.yml.bk
rm configuration.yml
nano configuration.yml
theme: dark #Toggle between dark mode and light mode
jwt_secret: eyJhbGciOiJIUzI1NiIsInR5cCI6IkpXVCJ9 #Update this secret

default_redirection_url: https://google.com/

server:
  host: 0.0.0.0
  port: 9091
  path: ""
  read_buffer_size: 4096
  write_buffer_size: 4096
  enable_pprof: false
  enable_expvars: false
  disable_healthcheck: false
  tls:
    key: ""
    certificate: ""

log:
  level: debug

totp:
  issuer: ambientnode.uk #Change to your top level domain. Authelia only supports 1 top level domain. For multiple top level domains, you will need to create multiple instances of Authelia.
  period: 30
  skew: 1

authentication_backend:
  disable_reset_password: false
  refresh_interval: 5m
  file:
    path: /config/users_database.yml
    password:
      algorithm: argon2id
      iterations: 1
      key_length: 32
      salt_length: 16
      memory: 1024
      parallelism: 8

access_control:
  default_policy: deny
  rules:
    - domain:
        - "auth.ambientnode.uk" #Change this to the subdomain used by Authelia
      policy: bypass
    - domain: "*.ambientnode.uk" #Change this to the wildcard for your domain to allow Authelia to secure them.
      policy: one_factor

session:
  name: authelia_session
  secret: SflKxwRJSMeKKF2QT4fwpMeJf36POk6yJV_adQssw5c #Update this secret
  expiration: 36000  #Session timeout after 10 hours
  inactivity: 3600  #Timeout due to inactivity after 1 hour
  domain: ambientnode.uk  #Change to your top level domain

regulation:
  max_retries: 5
  find_time: 10m
  ban_time: 12h

storage:
  local:
    path: /config/db.sqlite3
  encryption_key: eyJzdWIiOiIxMjM0NTY3ODkwIiwibmFtZSI6IkpvaG4gRG9lIiwiaWF0IjoxNTE2MjM5MDIyfQ #Update this with a random string longer than 20 characters

notifier:
  disable_startup_check: true
  smtp:
    username: [email protected] #Your SMTP email address
    password: iwibmFtZSI6Ikp #Your SMTP password
    host: smtp.gmail.com #Your SMTP server
    port: 587 #Your SMTP port
    sender: [email protected] #Your SMTP email address
    identifier: localhost
    subject: "[Authelia] {title}" #Email subject
    startup_check_address: [email protected] #Your SMTP email address
    disable_require_tls: false
    disable_html_emails: false
    tls:
      skip_verify: false
      minimum_version: TLS1.2
...
- Replace the placeholder values with their actual configuration details
- Save and exit
- Now, to configure user accounts, edit the user_database.yml
cp users_database.yml users_database.yml.bk
nano users_database.yml
- Passwords are generated using Argon2 hashes. To generate the password, head to Argon2 and generate the hash like so:
- Plain Text Input: Enter the user's password in plain text
- Salt: Generate a random salt by clicking the gear icon.
- Parallelism Factor: 10
- Memory Cost: 2048
- Iterations: 2
- Hash Lenght: 32
- Copy the hash from the "Output in Encoded Form" field
- Complete the users_database.yml configuration:
users:
  admin: #Change the username
    displayname: "admin" #Change the displayname
    password: "$argon2HASH" #Replace with the generated hash
    email: [email protected] #Change the email address
    groups:
      - admins
      - dev

#add more users if needed
- Save and exit
- Restart the container:
cd ~/authelia
docker-compose up -d
Setting up Authelia with Nginx Proxy Manager
Nginx Proxy Manager streamlines Nginx proxy host management and simplifies reverse proxy setup configuration and maintenance. It allows efficient traffic routing to backend services while offering features like SSL termination and load balancing. The combination of Nginx Proxy Manager with Authelia is beneficial due to Authelia's authentication and access control mechanisms integration, enabling users to secure web services with advanced authentication methods and control access based on user authentication status.
- Add Authelia to your Nginx Proxy Manager's hosts:
- Sign in to Nginx Proxy Manager
- Navigate to Hosts > Add Proxy Host
- Domain Name: auth.yourdomain.com, as defined in the Authelia Config file
- Point it to http://{HOST}:9091
- Enable SSL
- Authelia is now accessible through https://auth.yourdomain.com
- To allow Authelia to protect other services through NPM, existing services will need to use a custom Nginx Configuration to ensure that traffic is only allowed to the service when Authelia is authenticated (logged in).
- To set up this custom config, select an existing host within NPM and click the Advanced tab.
- Paste in the following configuration and replace the placeholder values with their actual configuration details.
location / {
    auth_request /authelia;
    auth_request_set $target_url $scheme://$http_host$request_uri;
    auth_request_set $user $upstream_http_remote_user;
    auth_request_set $groups $upstream_http_remote_groups;
    error_page 401 =302 https://auth.ambientnode.uk?rd=$target_url; #Replace with your domain for Authelia

    proxy_pass http://10.10.10.23:80; #Replace with the target address of the service
    client_body_buffer_size 128k;
    proxy_next_upstream error timeout invalid_header http_500 http_502 http_503;
    send_timeout 5m;
    proxy_read_timeout 360;
    proxy_send_timeout 360;
    proxy_connect_timeout 360;

    proxy_set_header Host $host;
    proxy_set_header X-Real-IP $remote_addr;
    proxy_set_header X-Forwarded-For $proxy_add_x_forwarded_for;
    proxy_set_header X-Forwarded-Proto $scheme;
    proxy_set_header X-Forwarded-Host $http_host;
    proxy_set_header X-Forwarded-Uri $request_uri;
    proxy_set_header X-Forwarded-Ssl on;
    proxy_redirect http:// $scheme://;
    proxy_http_version 1.1;
    proxy_set_header Connection "";
    proxy_cache_bypass $cookie_session;
    proxy_no_cache $cookie_session;
    proxy_buffers 64 256k;

    set_real_ip_from 10.0.0.0/8;
    set_real_ip_from 172.0.0.0/8;
    set_real_ip_from 192.168.0.0/16;
    set_real_ip_from fc00::/7;
    real_ip_header X-Forwarded-For;
    real_ip_recursive on;
}

location /authelia {
    internal;
    proxy_pass http://host:9091/api/verify; #Replace with your host's IP address for Authelia's API
    proxy_set_header Host $http_host;
    proxy_set_header X-Original-URL $scheme://$http_host$request_uri;
    proxy_set_header X-Real-IP $remote_addr;
    proxy_set_header X-Forwarded-For $proxy_add_x_forwarded_for;
    proxy_set_header X-Forwarded-Proto $scheme;
    proxy_set_header Content-Length "";
    proxy_pass_request_body off;
}
I wanted to take some time to explain the Authelia configuration yaml above, as it can be confusing the first time you see it.
- Root Location Block (
location /): auth_request /authelia;: Enables authentication. Any request to this server first goes to the/authelialocation for authentication.auth_request_set $variable $upstream_http_header;: Sets variables based on the response from the Authelia authentication.error_page 401 =302 https://auth.ambientnode.uk?rd=$target_url;: Redirects unauthenticated users (HTTP 401 error) to a specified login URL.proxy_pass http://10.10.10.23:80;: Forwards requests to a specified internal server after authentication.- Various
proxy_directives: Configure how NGINX acts as a proxy, including timeouts, buffer sizes, and handling of upstream errors. proxy_set_header: Sets headers for the proxied request, ensuring the receiving server gets necessary client and proxy information.set_real_ip_from: Specifies trusted IP ranges for setting the real client IP.real_ip_header X-Forwarded-For;: Tells NGINX which header contains the real client IP.real_ip_recursive on;: Allows NGINX to use the real IP from any of the specified ranges.- Authelia Location Block (
location /authelia): internal;: This location can only be accessed internally (i.e., as anauth_requestfrom NGINX).proxy_pass http://host:9091/api/verify;: Forwards authentication requests to Authelia's verification API.proxy_set_header: Similar to the root location, sets headers for the proxy request. Notably,X-Original-URLis set to the original request URL.proxy_pass_request_body off;: Ignores the request body for authentication requests.- Click Save and test the service. Visiting the domain should now prompt for Authelia credentials before allowing access to the service.
- Repeat the same for other services to protect them.
At this point, Authelia is set up and is configured to protect existing services.
Conclusion
This guide was a walkthrough of setting up the basics for Authelia. Authelia is an extensive platform and I encourage you to check out Authelia's documentation and explore additional resources to unlock its full potential.