UrBackup - A FOSS Backup and Recovery System
Set up UrBackup for reliable, cross-platform data protection and recovery.
Contents
This guide is part of a longer 3-2-1 backup write-up, covering UrBackup, an open-source client/server backup system designed to ensure the efficient and secure backup of data. It combines image and file backups to achieve both data security and a fast restoration time.

Key Features
- Client/Server Architecture
- Backup Types:
- File Backup: Allows for the backup of individual files and directories.
- Image Backup: Backs up entire partitions or disks, allowing for complete system recovery.
- Cross-Platform: Linux/macOS/Windows/FreeBSD (both as client and server)
- Deduplication: Minimizes the amount of storage space needed for backups.
- Incremental backups: Only the changes made since the last backup are saved, reducing backup time and storage requirements.
- User-Friendly Web Interface
- Encryption (both in transit and at rest) and RBAC
- Scalable: From home networks to enterprise environments.
Check the official documentation for the full feature list and limitations.
Requirements
- UrBackup runs on just about anything - this guide will focus on deploying it through Docker Compose (Linux). The docker image has two volumes - a persistent volume for the application itself and a volume mapped to a path on the host machine that is intended to keep the actual backup data. Sufficient space is required on the host path depending on your setup.
Deploying UrBackup
Mounting External Storage
Mount a NAS or other storage media. If using in production, create a credentials secret. The command below is for test purposes only. The container's urbackup user must have direct access to the mapped backed storage volume (GID 101, UID 101):
-
mkdir /media/backups -
sudo mount -t cifs -o username=user,password=password,uid=101,gid=101, //IP/SHARE/FOLDER /media/backups -
sudo chown -R 101:101 /media/backups
Deploy the Stack
version: '3.8'

services:
  urbackup-server:
    image: uroni/urbackup-server:latest
    container_name: urbackup-server
    ports:
      - "55413-55415:55413-55415"
      - "35623:35623/udp"
    volumes:
      - /media/backups:/backups
      - urbackup:/var/urbackup
    restart: unless-stopped
volumes:
  urbackup:
- Wait for the container to start up, then navigate to http://{{Host_IP}:55414.
Key Settings
Review key settings on the Settings tab:
- Frequency and types of backups.
- SMTP alerts
- URLs and proxies
- At the time of writing, the LDAP and AD integrations are undergoing development and may not work.
- Navigate to Settings > Users and create a new admin user, otherwise the web interface will be accessible without a password.
Adding a Client
Install the client app from www.urbackup.org, no further configuration is required on the client.
To add a client, go to Status > Add Client. There are two options to connect a client:
- Internet/Active: For clients that are connected over the internet (your server must be exposed externally for this to work).
- Local: For clients residing on your local LAN. The client must be reachable by its IP/hostname.
Backup Process
Image Backups
As soon as a new client is connected, the first full image backup starts. Progress can be tracked on the Activities tab. After this backup is complete, the next full image backup will occur in 60 days. In the meantime, incremental image backups are saved every 7 days.By default, there will be a maximum of 30 incremental backups and a maximum of 5 full image backups kept around at any one time. This equates to a full backup coverage of 300 days in total.
File Backups
In order to perform a file backup (so not the entire disk, only selected paths), the path of the folder/directory must be specified.
This can be done either directly on the client via the tray icon, or by setting a default path to back up under Settings > File Backups.
Cleanups
Data is cleaned up and non-backup actions (like client deletions) are performed during the specified clean-up window under Settings > Server so that the system is not overloaded during regular operational hours.
Recovery Process
Remember: Your backup solution does not work until it was successfully tested.
- Restore backups from the web portal as admin:
- Navigate to Backups and click Restore next to the backup you want to restore. The option to restore will be shown as long as the client is online and will require user confirmation on the client device.
- Restore backups from the web portal as a user:
- Create a new user on the portal (Settings > Users) and set their access right to the endpoint.
- Then, the user can navigate to the UrBackup web portal, sign in and restore the required backup from the Backup tab. The option to restore will be shown as long as the client is online and will require user confirmation on the client device.
- Restore backups from the client directly.
- Right-click on the tray icon and select Access/Restore Backups.
- Restore from a USB drive:
- In case of an unresponsive client, you can restore a backup using UrBackup's restore image. Write the image to a USB drive with Balena or Rufus, then boot from it.
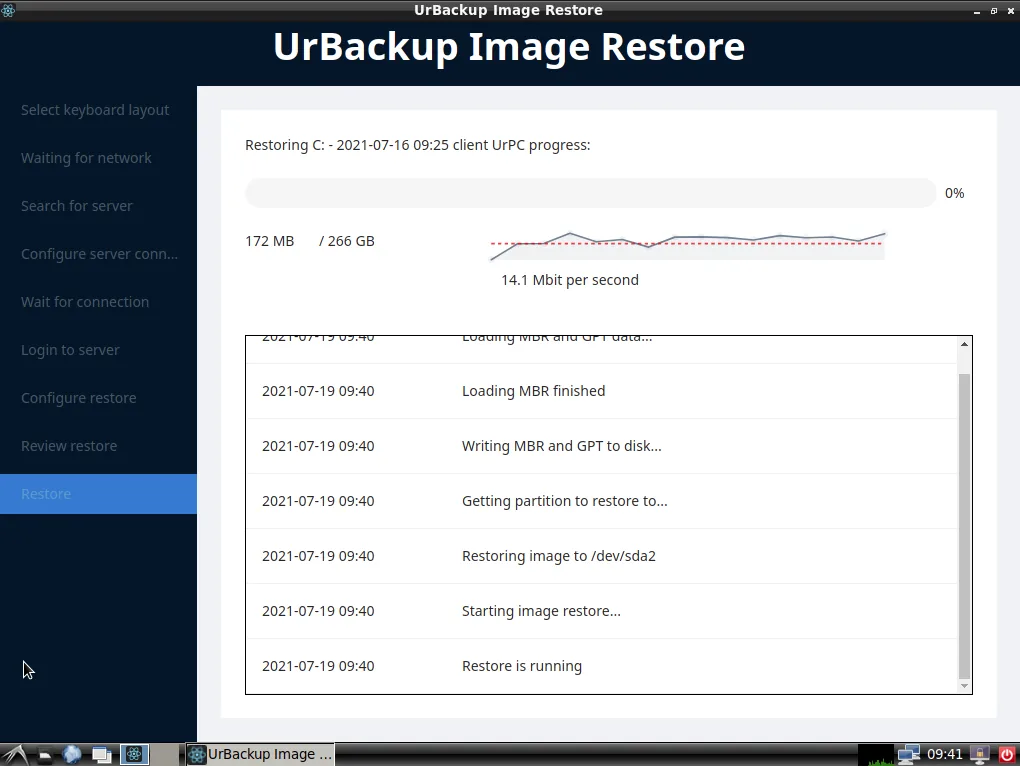
- After booting up, it will look for a UrBackup server, asks for a login credential and allows you to restore the system based on a previous backup. The target disk must be at least as large as the original disk. Image backups cannot be restored while the system is running.