Using ESP32 for WiFi Deauth
Build your own WiFi penetration tool with ESP32 for research. Capture handshakes, deauth, and more.
WARNING: Only perform deauthentication attacks on networks for which you have explicit authorization. This guide is intended for research and educational purposes only.
I have an old deauther from Maltronics, but I wanted to see if I can buil one myself from scratch. I found this GitHub repository by Risinek - ESP32 WiFi Penetration Tool - that includes a lot of features:
- PMKID Capture: Captures the Pairwise Master Key Identifier (PMKID) for cracking WPA/WPA2 passwords.
- WPA/WPA2 Handshake Capture and Parsing: Captures and analyzes WPA/WPA2 handshakes.
- Deauthentication Attacks: Disrupts the connection of devices on a WiFi network by sending deauthentication packets.
- Denial of Service (DoS) Attacks: Overwhelms a network with traffic to disrupt its normal operation.
- PCAP Format: PCAP files for analysis.
- HCCAPX File Creation: Converts captured handshakes into HCCAPX files, which are used with Hashcat for password cracking.
- Passive Handshake Sniffing: Monitors and captures WPA/WPA2 handshakes without actively disrupting the network.
- Management AP: Hosts its own SSID you can connect to in order to access its web interface.
For this project, I used an ESP-WROOM-32, a cheap ESP32 module with USB-C, and trimmed it down to 5mm thick by desoldering the contact pins. The goal is to create a compact, portable device capable of WiFi sniffing, denial-of-service attacks, capturing handshakes, and performing deauthentication attacks. If you are after cracking WiFi passwords, the ESP32 does not have enough computing power to do this. :)
WiFi Deauth vs. WiFi Jamming:
It's important to distinguish between WiFi deauthentication and WiFi jamming:
- WiFi Deauthentication: Sending deauthentication frames to a specific device or multiple devices on a network, causing them to disconnect. It targets individual or multiple devices but does not interfere with the network as a whole.
- WiFi Jamming: This involves emitting interference signals to disrupt or block all WiFi communication within a certain range, causing a broader impact on the network and connected devices. This is illegal in most countries. I’ve considered building a jammer for testing purposes on my own network, but have delayed this project since jammers are non-selective, and I want to avoid disrupting any networks other than mine.
Preparing the ESP32
Before proceeding, I want to stress again: do not perform deauthentication attacks on any WiFi network you are not authorized to use.
To start, connect your ESP32 to your computer. You'll need to identify the port it's connected to. Since I was already working on another ESP project and had https://web.esphome.io/ open on a Chromium browser, it showed up as a new device automatically. In my case, the port was COM3. Take a note of this port.
Next, clone the GitHub repository to a non-root location by running the following command (install Git if not already):
git clone https://github.com/risinek/esp32-wifi-penetration-tool.git
Set up ESPTool
Install ESPTool (requires Python), then run the following within CMD/Terminal:
pip install esptool
Flash the board
Replace COM3 with your port and run the following command to flash it to the device:
esptool -p COM3 -b 115200 --after hard_reset write_flash --flash_mode dio --flash_freq 40m --flash_size detect 0x8000 build/partition_table/partition-table.bin 0x1000 build/bootloader/bootloader.bin 0x10000 build/esp32-wifi-penetration-tool.bin
Web Interface
As the ESP32 is headless, the device will create its own local network with a web server to serve as the user interface. Connect the ESP32 to a power source and connect to its SSID (ManagementAP) with the password mgmtadmin, then navigate to 192.168.4.1 to view the interface.
Usage
- At every boot, the webserver is automatically started on the device. Connect to it using the credentials and IP address listed above.
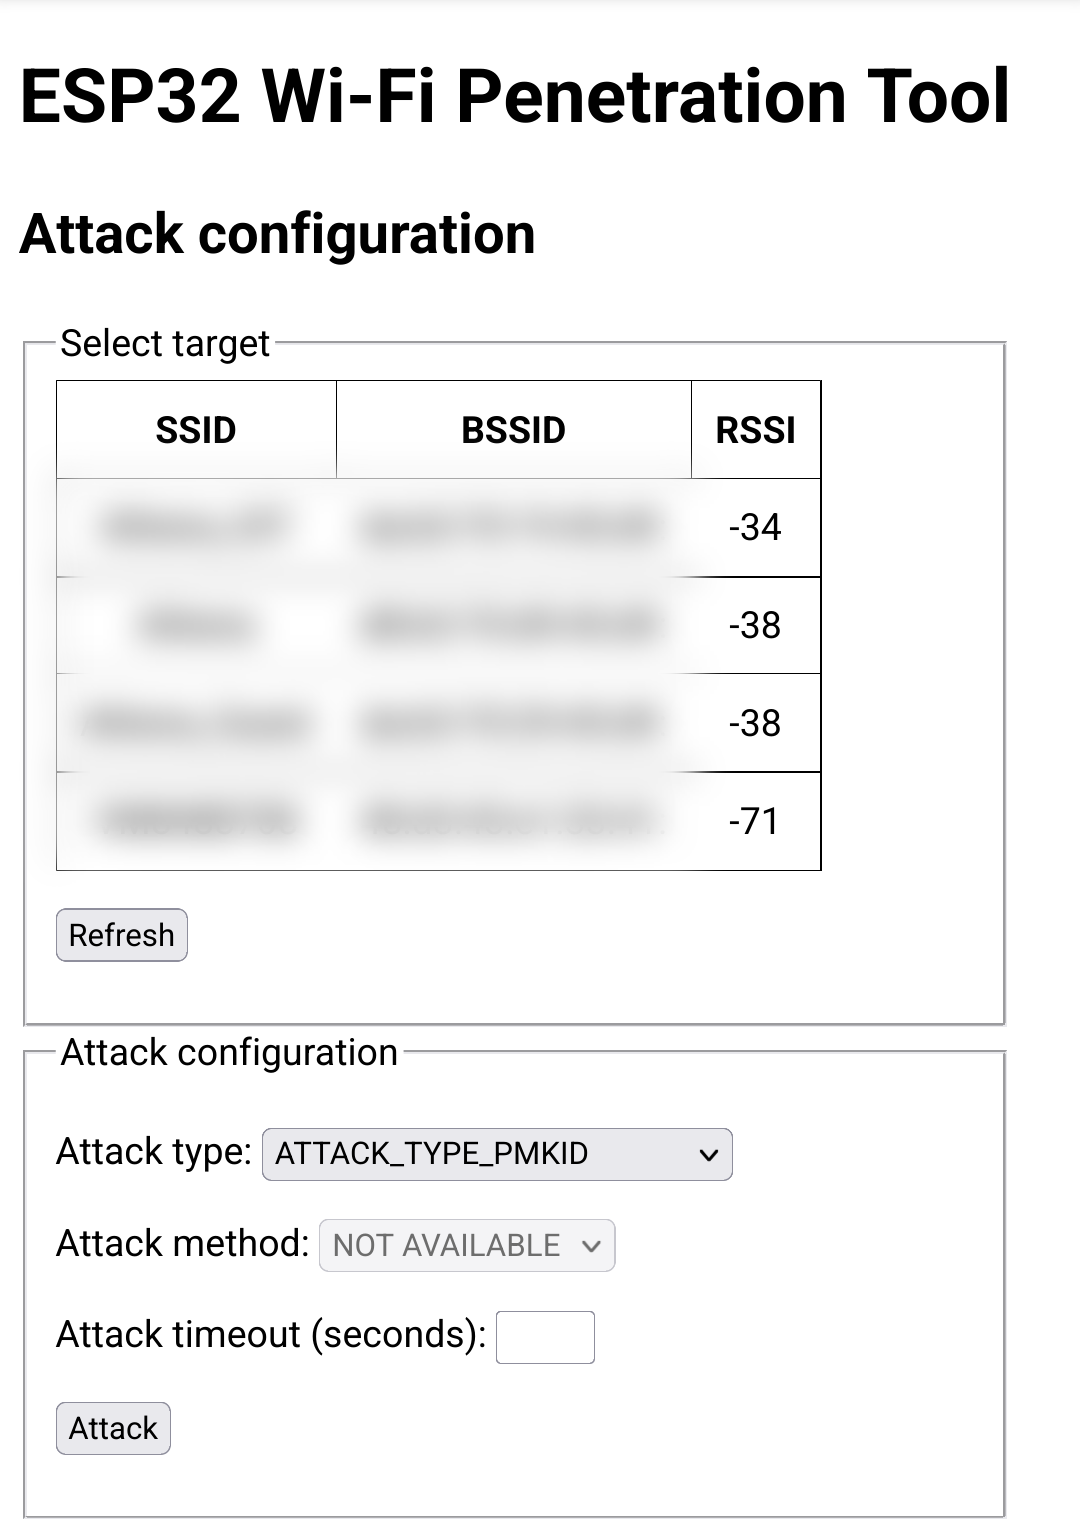
- During attacks, your client will disconnect from the device. Reconnect to it in order to gain control over it.
- The ESP32 will automatically scan for available networks. Select the target network, then configure the attack to test the network - as described in the features list above, the possible options are DOS, MPKID and HANDSHAKE.
As with everything, please read the docs and have fun experimenting on your authorised network.